Learning to speak Japanese fluently before heading to Japan is almost impossible for a casual learner, but it’s still a good idea to have some useful phrases to get around. Even better, have a language guide book on hand so you can point to the phrase you’re trying to speak! Here are some of the phrases I found most useful on my trips:
こんにちは – Konnichiwa – Hello
ありがとう
– Arigatou – Thank You)
すみません
– Sumimasen – Excuse Me/I’m Sorry
お願いします
– Onegaishimasu –
Please
ください
– Kudasai – Please
(informal)
はい
– Hai – Yes
いいえ
– Iie – No
(rarely used)
ごめんなさい
– Gomennasai –
I am sorry
英語はわかりますか
– Eigo wa
wakarimasu ka? – Do you understand English?
·
Go into
the bathroom and remove all of your clothing. I have fat that gathers into
massive love handles, stretch marks on every bit of skin that isn’t flat. But
when my clothes are all off, with no fabric to bother me, no illusion of what
my body looks like and all I can see is myself, I feel better. I feel more
wholesome. Maybe you will, too.
·
Run your
hands over it, turn around. Have no illusion of what your body looks like. It’s
not as bad as you think. Get a good picture in your mind of anything you want
to attend to. Make a list if you need to, only about your body.
·
Brush
your hair through, if you have it.
·
Put your
hair up and out of the way, if it’s long.
·
Floss and
brush your teeth very well. Take your time on this. Do it twice if you need to.
Your breath won’t feel as thick, you won’t feel as heavy.
·
Put on
lots of chapstick or balm right afterwards
·
Wash any
parts of your body that you need to.
·
Blow your
nose until there’s nothing left, get it all out. You’re probably clogged up.
·
Clip your
nails, take off any old polish. Push your cuticles back.
·
Wash your
hair, if you want to.
·
If you (like to)shave, shave everything. You’ll feel weightless. Only fill up the bath a little
bit and do it over the edge. You’ll just feel dirty if you sit in hair.
·
Drink a
full glass of water. Don’t sip, don’t chug. Just don’t set it down until it’s
gone.
·
Dress
yourself in whatever way you feel ready for the day. Yoga pants, sweatpants,
t-shirts, dresses, shorts. Whatever way that makes things easier.
·
Eat. Eat
something. Don’t pull random bits of food from random boxes. Prepare it at once
and sit down. Take this time to rest.
·
Get a
drink of your choice, as long as it isn’t alcohol. As a matter of fact, if
there’s alcohol on the counter, put it away. Don’t look at it. It will only
give you a headache. Make yourself chocolate milk, water, a smoothie, a soda,
whatever sounds nice.
·
Sit on
the floor and forget about everything you need to think about. Set a timer for
exactly one minute. Close your eyes, and during that one minute, pay attention
to how your body feels. Ask yourself these questions. Am I sore anywhere?
Stretch this bit out, put more pressure on it. Focus on your muscles. Keep your
back completely straight. Did I eat enough? Think about your stomach. Focus on
your breathing. Listen to the air. Can you hear the sound of your lights? A
ceiling fan? Your joints? Don’t open your eyes until the time is up. This
minute will pass very quickly.
·
Get a
good old fashioned piece of notebook paper and a pencil. If you don’t have that
use your phone or computer. Make a list of every little thing you need to do.
Everything matters. Every errand, homework assignment, thing that needs
cleaned, health issue… all of it.
·
Do it
now. Check things off as you go. As you see things disappear, your head will be
more clear.
·
Don’t
forget to take your pills.
·
If you’ve
been putting off your homework, fix yourself a snack and a tall drink of
something warm. Get all of the supplies you need. Sit down and plow through it.
If you need help with homework, message a friend, a family member, even message
me. I’ll try and help you. It won’t take as long as you think, your mind is
just cluttered. Repeat to yourself “this is what I am working on now. This is
what is important now. I will feel lighter when I am finished.” Even if the
assignment is due in a few weeks, more than likely it is too much to do in one
night. Split it up into quarters. Work for one hour, and if you’re close,
finish it off. Give yourself this one hour.
·
You don’t
have to make your bed, but take off the blankets and shake them out. If there’s
crumbs on the mattress, vacuum, or wipe them off. If you have dirty clothes,
put them in the hamper.
·
Now that
your day is free, deal with your social problems. Is there someone you’ve been
meaning to apologize to? Something you’ve upset? Something you’re unsure of?
You have all of the rest of the day to deal with it. Take your time.
·
Before
bed, pay special attention to your face. Wash it, clean your ears, put on acne
medicine, moisturize it. Anything on your face that needs to be attended to.
See how beautiful you are? Your skin will drink it up, it will look better
tomorrow. Do this constantly.
·
Listen to
songs you haven’t in a while. You forgot that one verse, the reason why you
kept it.
·
Make a
list of questions. How does a remote work? Why do we have toenails? What is
this word? Look them up. They’re right there to know.
·
Ask for
help
·
It’s fine
to cry. I feel warm in the face afterwards. I feel smaller afterwards, less
huge. Less of a problem. You need to understand that we want to matter, but
when we mess up we don’t want it to matter. It goes both ways. You are the most
important person. Your mistakes only have weight to you. Nobody minds as much
as you think they do.
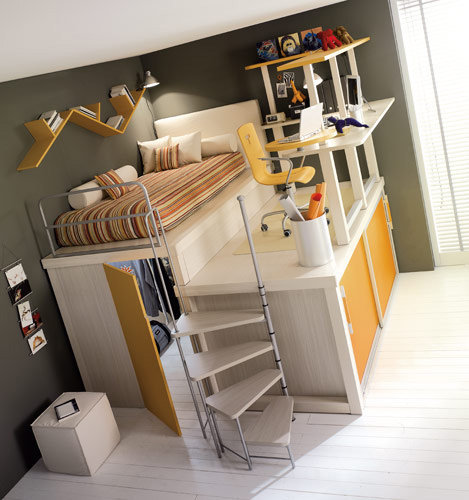
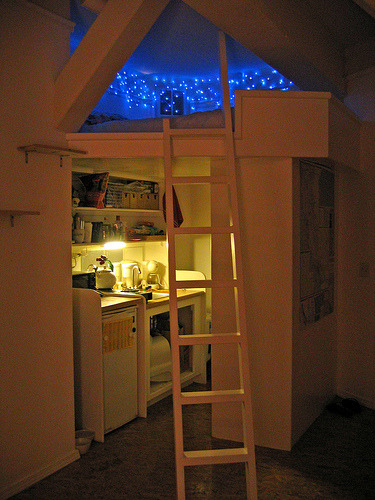
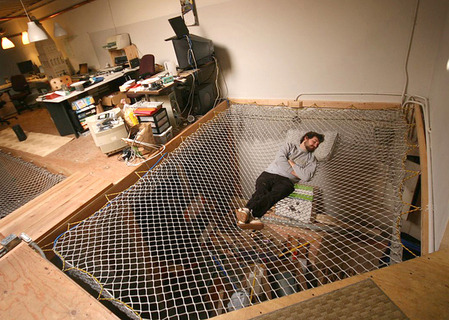
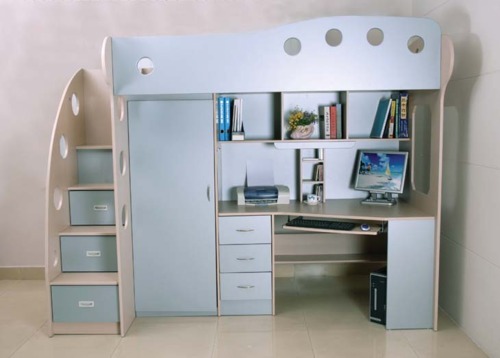
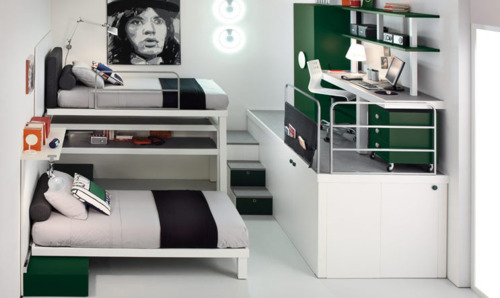
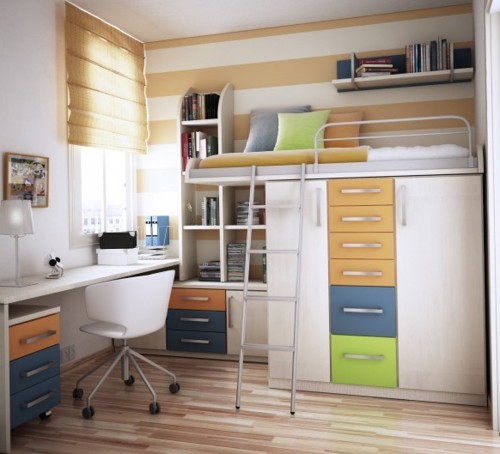
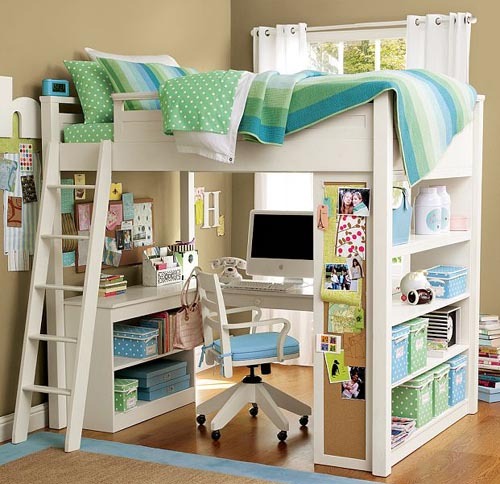
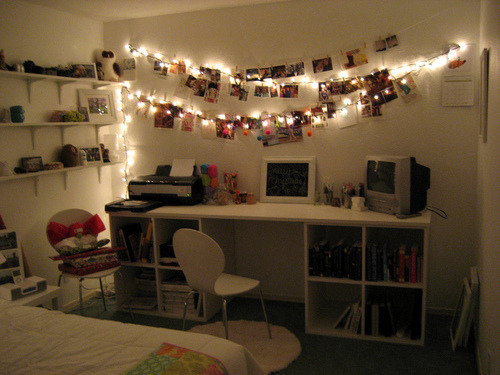
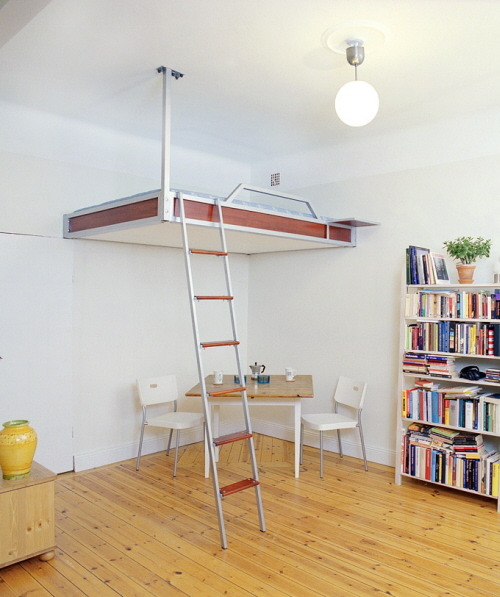
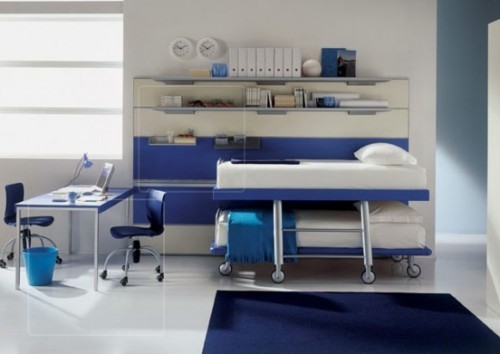
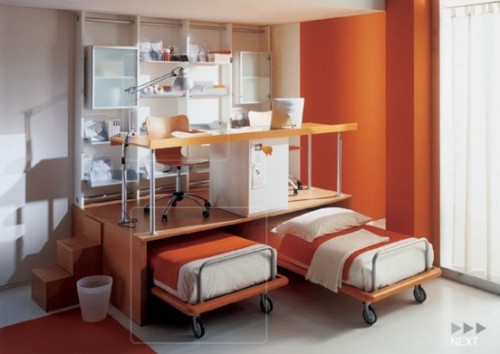
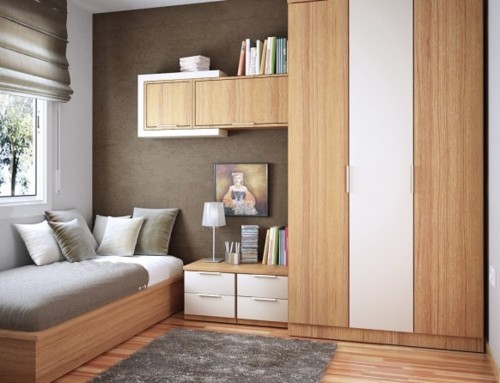
also known as Lofted Bedrooms, check these out, and a few other cool bedroom designs. I’m already drawing up a design to have one done for my house in the Philippines.
I’m in the middle of very serious procrastinating and my gosh. I want a loft bed. I love sleeping up high. Like a bird of prey. >:|
so for the different angles of the head, its very important for you to know the proportions of the front view before drawing different angles. There are many different ways of starting the front view but I will show how I always start it out.
always draw a circle (this is for ANY angle)
Draw a cross on the circle, the horizontal line should be drawn at the bottom of the circle, i would say between the first 1/3 and ¼ of the circle.
Draw the chin, and jaws and connect it to the horizontal line at the top
the nose should be at the center point where all the lines meet. The top of the ears should be where the eyebrows are (its ok if its eyes instead as well, I do that most of the time) and the mouth is aligned with the jaw.
same rules apply with any angle;
start with circle again
draw the cross (see how the cross curves against the circle, think of the circle as a sphere and not a 2D shape. Heads are round like a sphere)
draw the jaw and pinpoint the ear (directly under the jaw)
then draw the cheek (remember that cheeks CURVE!) and the mouth still aligns with the jaw and the nose aligns with the bottom of the ear. Remember that the nose and mouth should always align with the chin. the distance between the eyes should be another eyeball the same size. the eyes should be a tiny bit closer to the opposite eye than to the ear, leave some space but not too much.
side profiles are the trickiest for me
circle again with a line on the edge of the circle
draw the chin and jaw, chins curve! necks do NOT go straight downward.
same alignments again as front view and ¾ view
please know that when you draw the actual face after sketching, you do NOT have to draw exactly as how the sketch is drawn. sometimes the drawing looks better if you dont completely follow the alignments etc, as long as it isn’t TOO wrong. if that makes any sense. Now that you know the alignments, you can apply to these rules to any head angle!!
if you want to draw people looking up or down: when you want to draw a person looking up, place the ears lower than usual. also if you look at the red circles next to the faces, the curves are much more bendy(?). when looking down, the ears are placed higher than usual and everything curves the opposite way.
Expressions
you just really need to exaggerate every feature on the face and you need to know how to read expressions.
remember that eyes are probably the most expressive feature (eyebrows too!).
in the first face, you can tell he’s in thought because of the way he furrows his eyebrows a little bit and his mouth is slightly tilted to show confusion or in thought.
in the second face, you can tell he’s uninterested/not amused etc because his eyebrows drop to a straight line and only half of his pupils are shown. His mouth hangs a little open too just to add a little bit to the expression 😀
you can tell he is angry here because the way it sort of explodes movement? His hair is everywhere, his whole head thrusts forward from his body, his pupils contract and his nose wrinkles up which shows aggression.
he is embarrassed here by the worry in his face. he’s looking down and head is sort of hiding away while his shoulders rise which usually shows signs of no comfort.
basically, you need to be able to know what each expression does, how to read them and be able to put that in a drawing!! study them! lots of great examples here (x) (x) (x) (x)
catch of breath, choke, gulp, heave, inhale, pant, puff, snort, wheeze, huff, rasp, sharp intake of air, short of breath, struggle for breath, swallow, winded
Hello, everyone! Someone asked me to make this masterpost, and i agreed instantly: taking care of your mental (and physical) health is extremely important, and I want you guys to have a great study experience. My chat and ask box are always open and it would be no problem to help if any of you are having problems! ❤️
I know a ton of you have been waiting for this one. Teaching you to make your own plastic keychains!
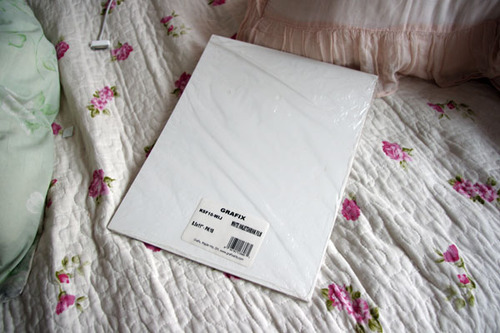
To start off, I think the biggest question everyone has is what I use to make them. I work with shrink film. You might be familiar with Shinky Dink brand shrink film as a kid. I use Grafix brand white inkjet shrink film. The inkjet kind is relatively pricey compared to the regular kind. If you’re using regular, I don’t recommend you stick it in your printer. Sharpie markers would be good for that.
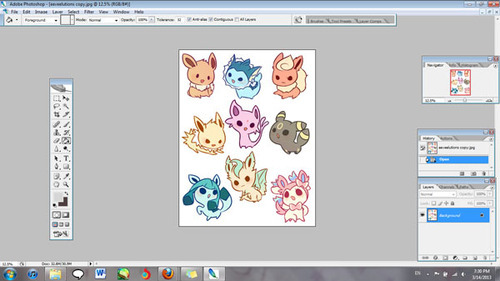
Alright, now open up the file with the images that you’re working with. Make sure your images are a lot bigger than you want your finished product to be since they shrink significantly.
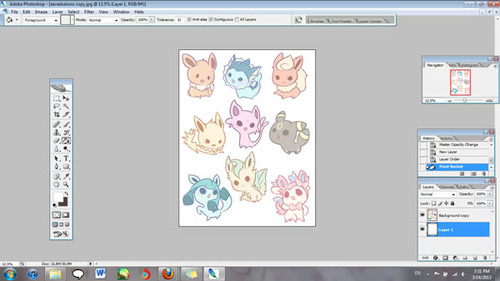
You’ll also want to lighten the opacity to about half. I go somewhere between 50-60%.
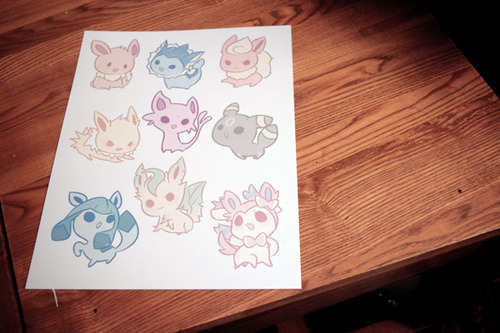
Now print your image out! I’ve found that it works best for me when I have it at the plain paper setting, and standard print quality.
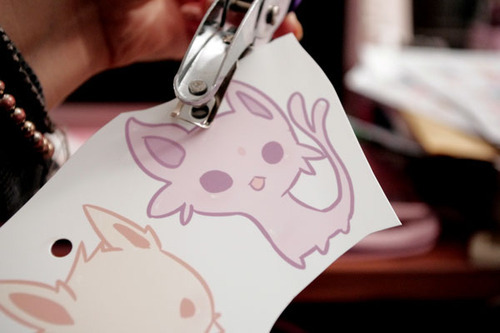
Holepunch with a ¼" holepuncher BEFORE you shrink them. It’s so much more work to have to punch holes when your plastic is thick!
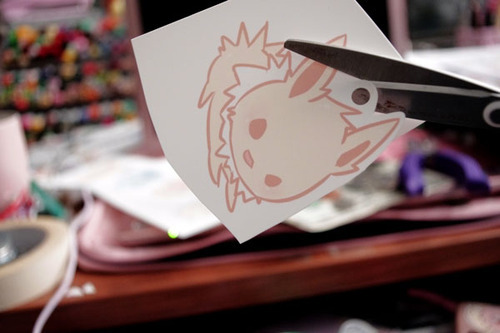
Cut out your design, leaving the amount of border you want.
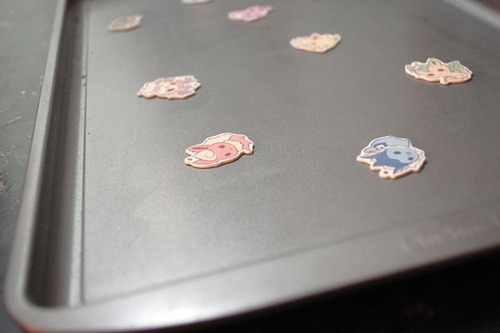
Set them on a tray for convenience. An aluminum foil sheet works too, but I recommend cookie trays because they are easier and quicker to get out of the oven.
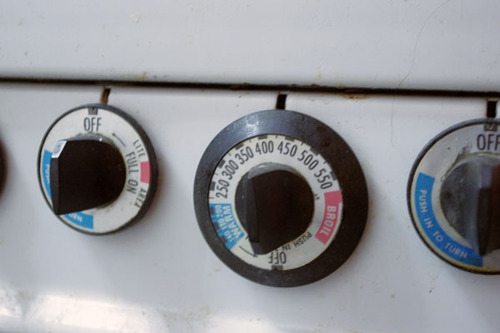
Preset heat. Your shrink film package will tell you what temperature to set it at, but I find that it isn’t always accurate for me. I generally set temperature to 350 degrees or so.
Put them in the oven. Remember to keep track of time! I leave them in for about a minute and a half.
After time is up they should be super small! Magic!
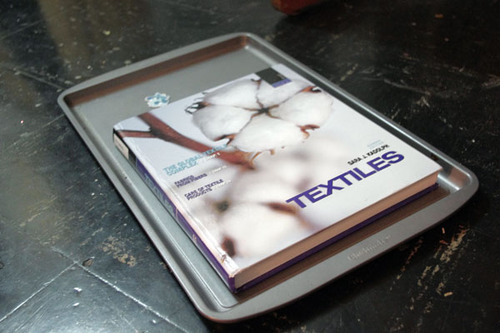
If your charms are not flat, put something heavy on it right out of the oven when they are still hot and malleable.
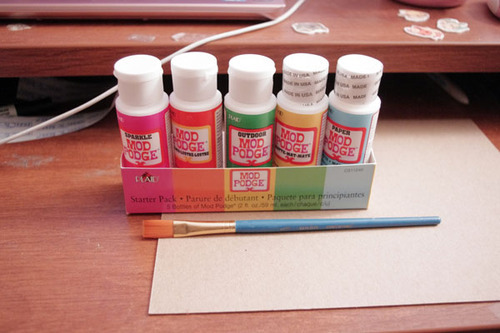
If you’d like to, you can seal them now. In my last two batches, I used clear topcoat nail polish. The problem with that is that I need between 3-5 coats of it, and it takes a while to dry. I’ve been experimenting with modpodge.
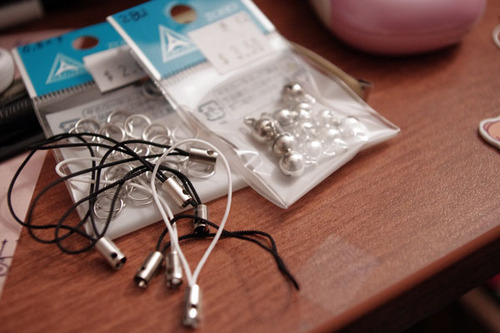
For lariats, you can use jump rings or lobster clasps.
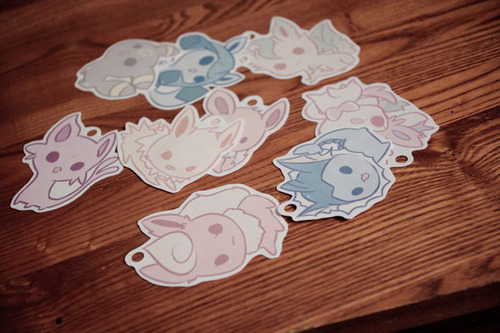
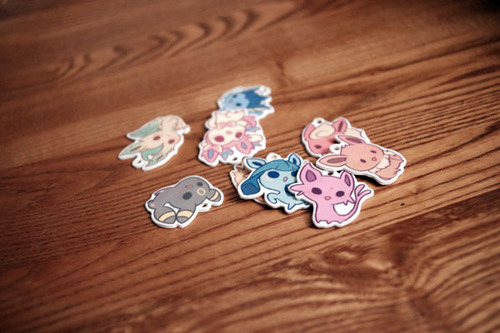
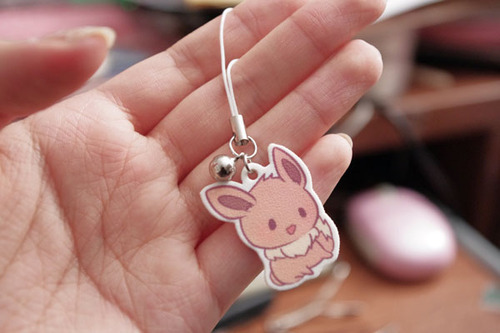
Here is one that I made that wasn’t sealed. The finished texture after shrinking is a little bit rough. There’s nothing wrong with leaving them unsealed, but because they are inkjet printed, the colors wash right of without protection.
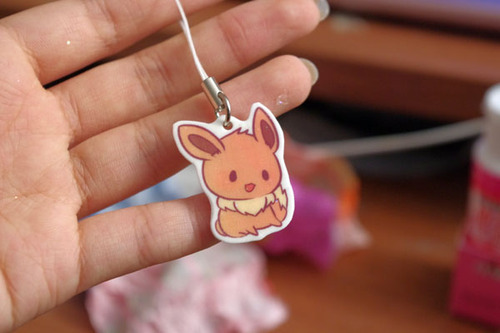
This is one that was sealed with modpodge. The colors become a little more vibrant and smooth and water resistant. Things often get stuck on when applying or drying so be careful.
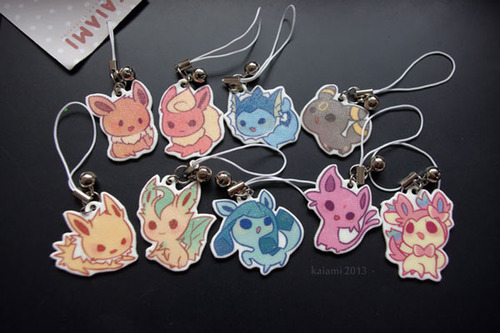
These ones down here were sealed with clear nail polish. They come out shiny if you put enough coats, but the grainy texture will still be there.
Well, there ya go! Have fun making your own keychains!


